Jaguar XJ6 SIII 7" headlamp conversion
Here is how I went about upgrading my wife's 1985 Jaguar Series III XJ6 to
have the 7" outer headlights that the designers intended. I bought some
used trim rings on eBay from someone in England; some new WIPAC plastic
repro 7" headlamp buckets; and some new headlamp wiring harnesses. Most
people probably re-use their existing headlamp wiring, and that is easier
in some ways, but I decided if I was going to go to all this effort, I
wanted to swap out complete units with all new parts. I just ordered TR6
repro harnesses from a TR vendor, but they're all the same, you could get
them from any supplier.
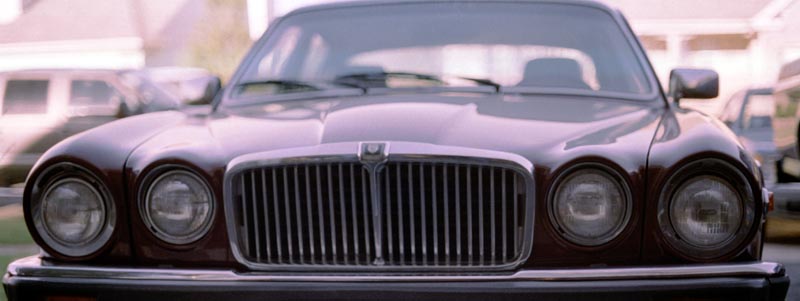
First, let's see why we'd even want to do this, with a look at the car
before and after the conversion:
|
Before
After
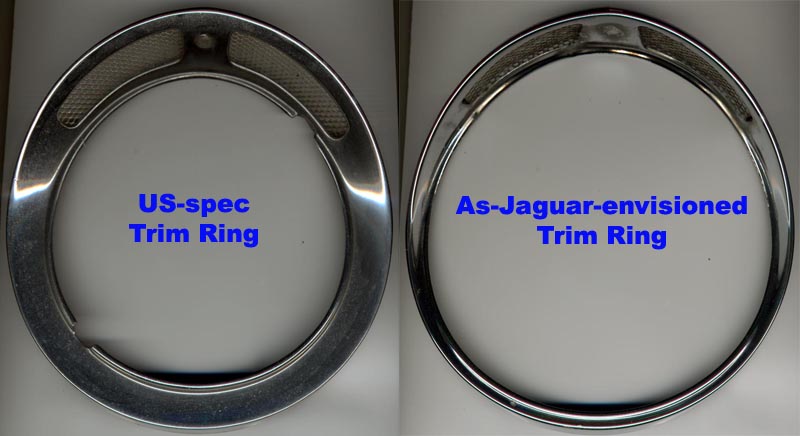
Wow, doesn't the US-spec version look pretty dumb? What were they
thinking? It's gotta be Ralph Nader's fault, I just know it.
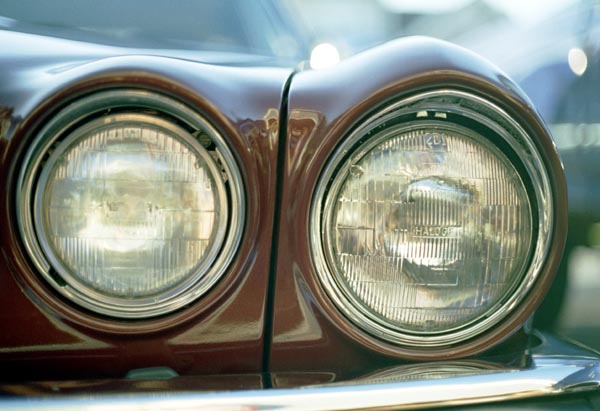
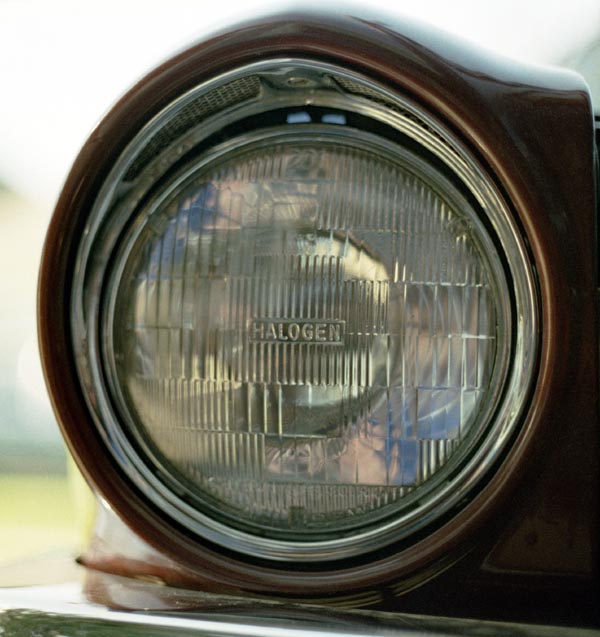
Let's take a closer look before and after:
|
Before
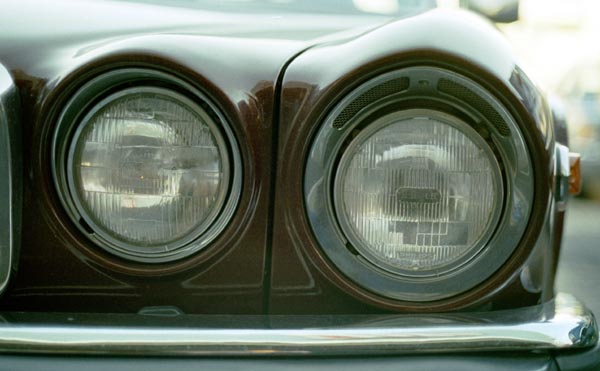
After
|
Here are just the rings, so you can see the difference:
|
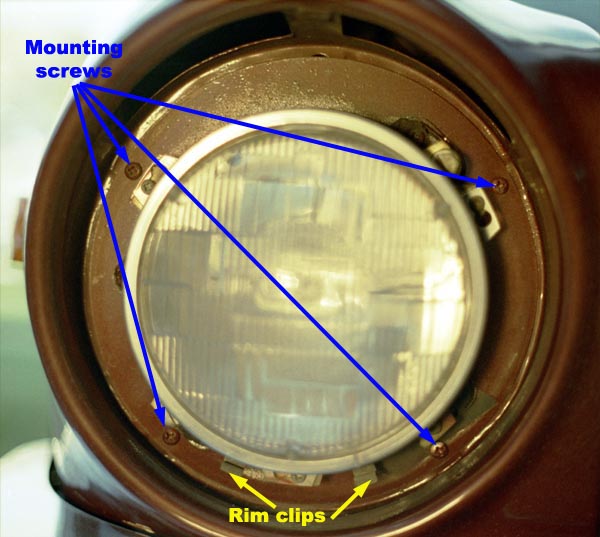
I started by removing the trim ring on an outer headlight. Just remove the
flathead screw up at the top center, and the ring will pull right away,
unclipping from the little metal clips at the bottom as it comes. Then I
removed the 4 mounting screws that hold the adapter plate and headlamp
bucket to the fender. (There is no need to remove the headlamp bucket from
the adapter plate.) If you were planning to re-use your existing wiring,
then before you remove the bucket, you should remove the headlight from the
bucket, remove the wires from the connector, and push the wires and the
rubber plug out from the old headlamp bucket. In my case I just let it
dangle on the wires after removing it, before proceeding to the next step.
Here is what you'll see after removing the original trim ring:
|
Since I wanted to install new wiring, it meant removing the old stuff. But
it runs through a blind channel in the fender, up into the engine
compartment where the connections are made. That's no fun! So I
disconnected the bullet connectors that were hanging out right at the hole
in the fender in the engine compartment, then tied a strong string around
all of them in such a way that it couldn't possibly pull off. Then, working
in the wheelwell, I pulled the harness and string back from the engine
compartment to the wheelwell, then working from the front of the car, I
pulled the bucket and harness and string forward and out the headlamp
opening. The right angle turn in the wheelwell makes it impossible to just
pull from the front in one go; you have to do it in two steps like this.
The result is a completely removed old bucket, and a string sitting there
ready to be able to pull the new wires back up to the engine compartment.
Here is the view from the engine compartment at this stage. On the left
side of the car, you need to remove the headlamp fuse panel and push it to
the side to be able to do this step.
|

|
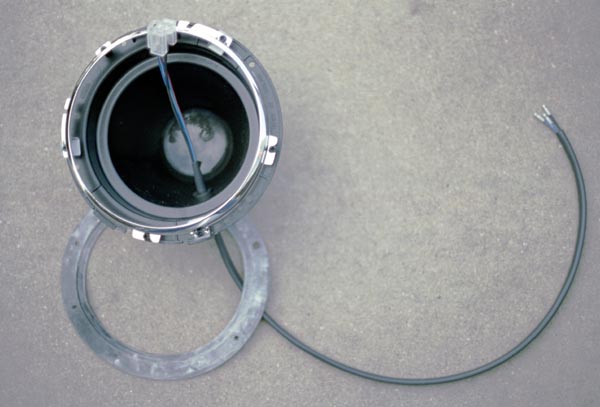
Here is the WIPAC plastic repro bucket, with TR6 wiring harness already
installed. I made sure the plastic sheathing on the wires (not just the 3
wires) was in the rubber plug, with the pointy part of the plug facing
towards the bullet connector end of the wires. I fed the wire shank
through the hole in the bucket, bullet ends first, from the inside towards
the outside. I used some soapy liquid (OK, you got me, I used Windex
because it was at hand...) to lube up the rubber plug, then pulled and
twisted until it had popped through the hole in the bucket and seated in
the ridge in the rubber plug. Remember to keep the sheathing in the plug;
if you let it slip until just the separate wires are going through the
plug, it won't seal out the elements. (This is more than likely the state
you found your original buckets in by the way!)
|
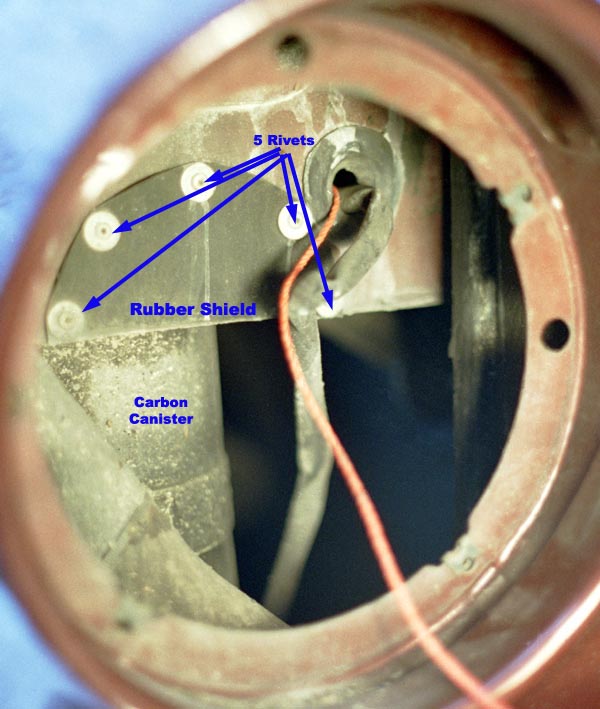
Here's where it got interesting because of the WIPAC buckets and the fact
that they stick so far out towards the back. There is a rubber sheet
riveted to a plate behind the headlights. I guess the idea is to have a
hole for the buckets to nestle back into, but with the rubber sheet to
prevent road splash from making its way up into the bucket through the
wiring rubber plug, which comes out the top. The rubber sheet would
actually move out of the way as designed when the too-long bucket hit it,
but those washers under the rivets jut into the opening and foul with the
bucket. So I simply drilled out all 5 rivets and removed the washers and
the rubber sheet and called it good. The plastic bucket should have no
problems with road splash anyway. But in any event, your life would be
simpler with an original metal bucket. (And even easier still if you have
an actual Jaguar bucket with the bottom clips for the trim ring! But I'm
getting ahead of myself...)
Here's what you'll see once the old bucket is removed (this is the right
side headlight):
|
The original setup had the adapter plate screwed right onto the fender,
with the isolation gasket going between the headlamp bucket and the adapter
plate. Because this bucket screws to the fender with an isolation gasket,
the original screws wouldn't quite reach through the additional thickness
of the gasket, plus my solution to the bottom clip problem also required
more screw length. So I simply bought some longer ones from the hardware
store.
Here is the new bucket installed, before I figured out I even had a bottom
clip problem:
|
The original trim rings are held in place on the bottom with springy metal
clips that lodge in grooved tabs on the trim rings. The US-spec clips are
spaced more narrowly than the larger ring tabs, so I couldn't just un-rivet
the spring clips from the old bucket and attach them to the new one. But
happily, the large ring's grooved tabs are exactly in line with the lower
mounting screws for the bucket! So I bent up some stiff wire into a clip
shape, with an eyelet to go under the lower mounting screws. I actually
used old pinball machine ball guides for my wire stock(!) but you could use
wire stock from the hardware store, or perhaps even a cut up clothes
hanger. The idea is to have a shaft in the right position to lodge in the
grooves in the tabs of the rings just to keep them roughly in place; the
upper mounting screw still provides the main means of keeping the ring
attached to the car.
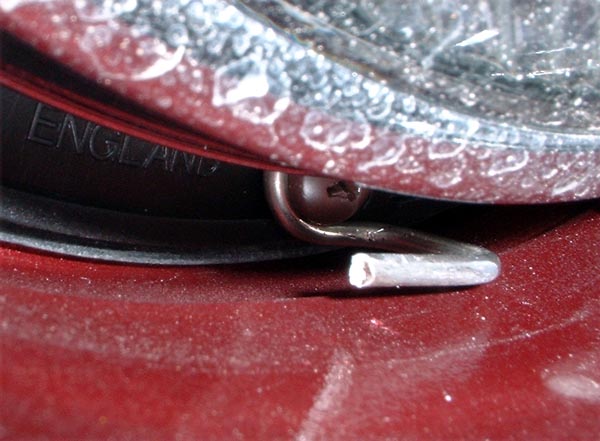
Here is a close-up of an installed clip; I hope you can get the idea of how
to make them from this:
|
|
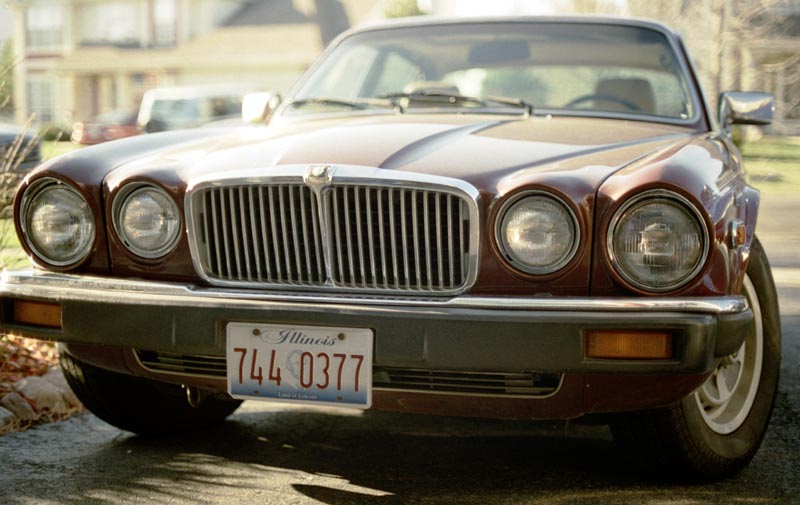
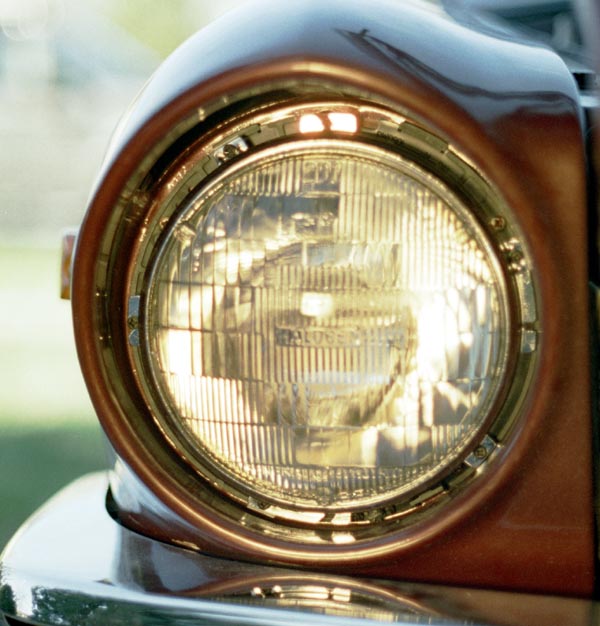
OK, finally, here is the finished installation:
|
|
And once more, let's remind ourselves why we wanted to do this:
|
Ahhhhhhhhhhh, pretty kitty!!!