Jaguar XJ6 SIII fuel switch analysis
My wife's 1985 Jaguar Series III XJ6 came with a recently installed
aftermarket fuel tank selector switch. It also came with no lights in the
holders for that row of switches. When I went to add bulbs, I became
really confused about how the fuel tank switch illumination was supposed to
work. I bought some used switches and looked at how they worked and
quickly came to the conclusion that the aftermarket company is cutting
corners and is flat-out making the switches wrong!
Here is an older fuel tank selector switch in the "in" position. Notice
how the illumination light, which comes into the switch through a "light
pipe prism" between each pair of switches, can go into the center chamber
(which is behind the logo on the switch), and into the lower chamber (which
is behind the left-facing red arrow on the switch.)
|
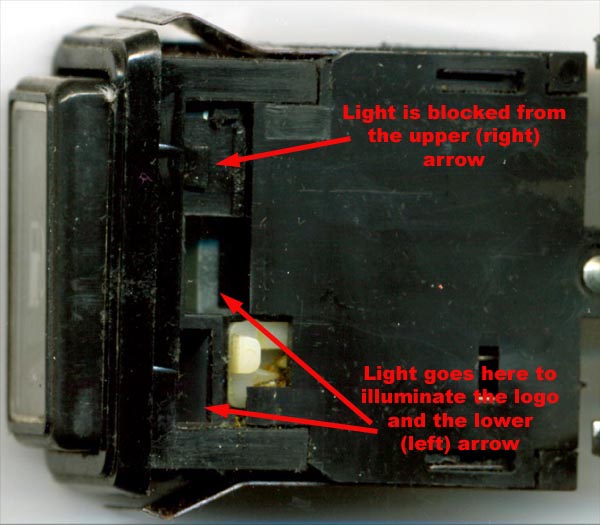
You can also see how those little chambers are painted white, to help
reflect the light around and out the face of the switch.
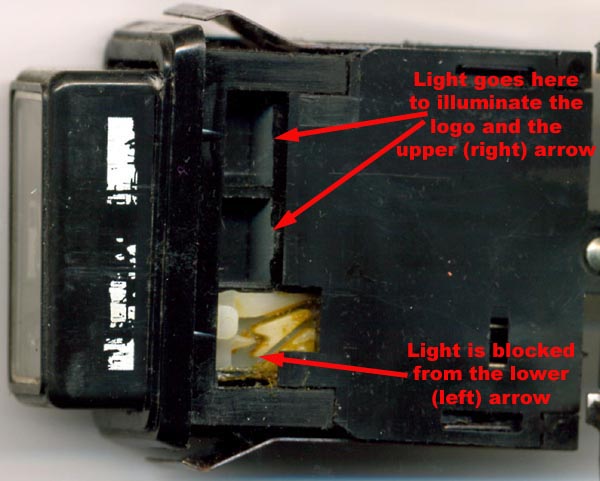
Here is an older switch in the "out" position. Notice how the light can
still go into the center chamber, so the switch logo is always illuminated
no matter what position the switch is in. But now it can also go into the
upper chamber (which is behind the right-facing green arrow on the switch.)
And notice how, in each position, light is blocked from going into the
wrong arrow chamber.
|
|
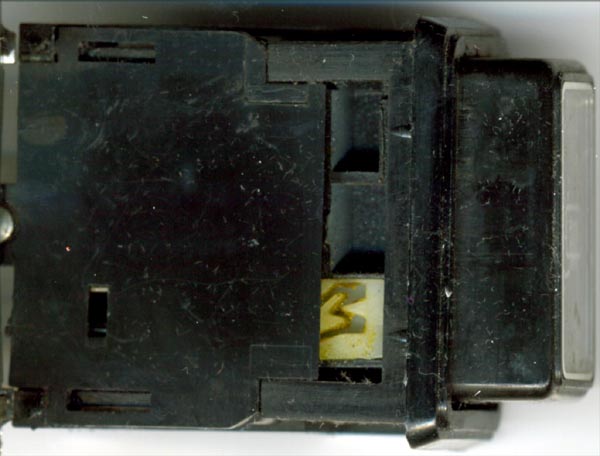
Now here is the aftermarket switch. Hey! It's built backwards! When it's
in the out position (right tank selected), the light is going into the
lower (left-facing arrow) chamber!
|
Also notice the lack of white paint in the chambers. I guess that's good,
in that it can't possibly illuminate the wrong arrow like it's trying to,
but it also can't illuminate the switch logo. Phooey.
So how on earth did they build the switch backwards? Well, it's due to
that shared light that pipes into each of the two switches in a group. The
switches are built as "left hand" and "right hand" switches. The fuel
switch and the "1" interior light switch are the left hand switches, while
the defroster and the "2" interior light switch are the right hand
switches.
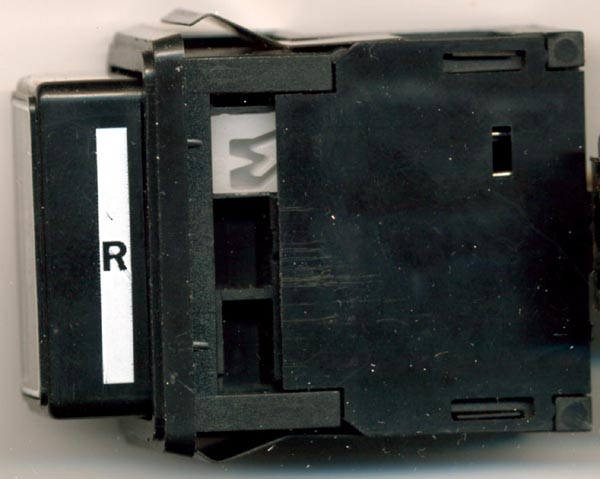
Here is a defroster switch, in its correct orientation, to show you the
concept. Notice if you spin the aftermarket fuel switch 180 degrees, it
looks just like this:
|
Jaguar (or Lucas) designed the switches so that regardless of which side of
the light pipe they were on, when they were out, the logo and upper portion
were lit and when in, the logo and lower portion were lit. Which requires
the right and left handed switches to be mirror images of each other. What
this aftermarket company has done is only replicate one set of molds, which
is the right-handed ones, probably by random chance. Then they just flip
the switch over for the left-handed switches, which electrically works
fine... but as you can see, completely ruins the illumination scheme.
Morons!
As long as we have the scanner out and a bunch of switches at hand, let's
see how it all works.
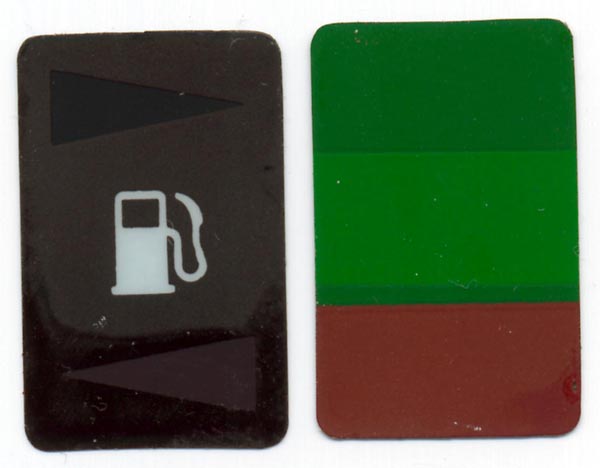
Starting from the outside and working our way in... The switch label is
made up of two sections of tinted plastic. Green on the top 2/3 and red on
the bottom third, like so (front and back views):
|
|
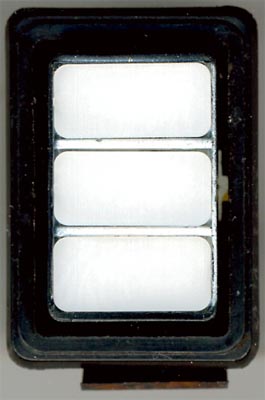
The three chambers in the button each have a plastic diffuser plate stuck
into the front face, to help spread out the light. (This is where
some of the light loss comes from, but not having it there to spread out
the light looks even worse.) Viewed from the front of the switch:
|
|
If you remove the diffusers, you can see that each chamber is also
spray-painted white, to help transmit and diffuse the light:
|
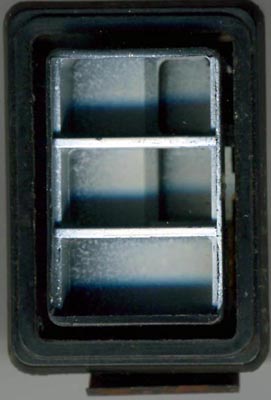
(They sure didn't do a very good job with the spray paint...)
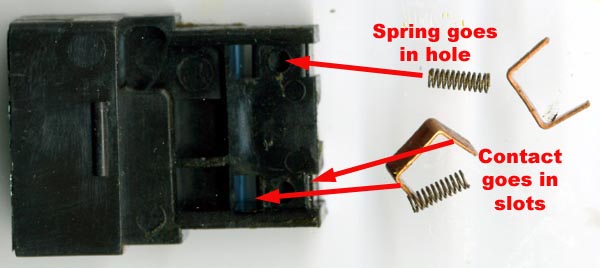
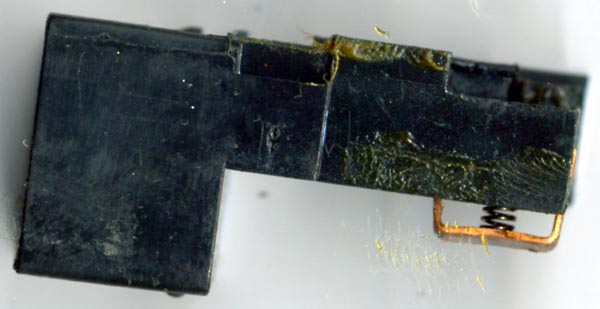
If we drill out the little rivet and slide the plastic cover back and away,
we can see the workings of the switch. There's the main part that slides
back and forth with contacts (which are hidden in this photo), and a little
spring that rides in the nylon "click track" to give the switch its action:
|

|
Here is the back side of the sliding part, showing how the spring-loaded
contacts fit into it:
|
|
Here's a side view, showing how the contacts fit in to the sliding part:
|
|
And here are the fixed contacts inside the housing, with the sliding part
removed:
|
So now if you ever have a flaky fuel switch, you should be able to take it
apart and clean it, just like you already do with those fun window
switches. It's the same basic idea with the same failure mode. Only
difference here is you need a drill to get it apart and a new rivet (or
tiny screw and nut) to put it back together.
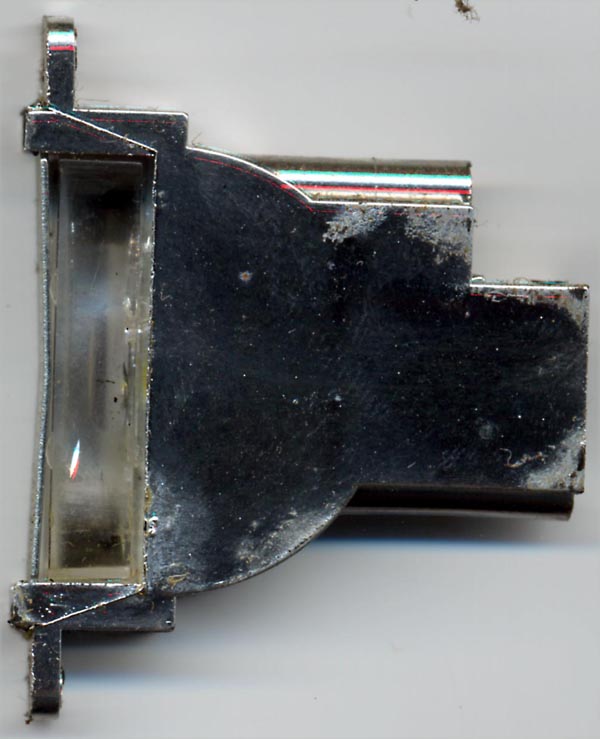
Here is the light pipe assembly from the side - this is where the light
comes out to go into the switch.
|
|
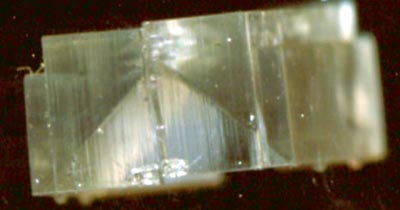
And here's the end view of that light pipe, showing the prism shape that
diverts the incoming light off to each side:
|
|
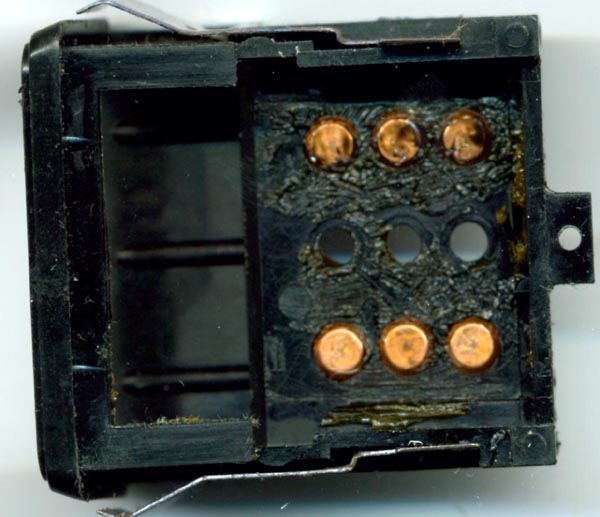
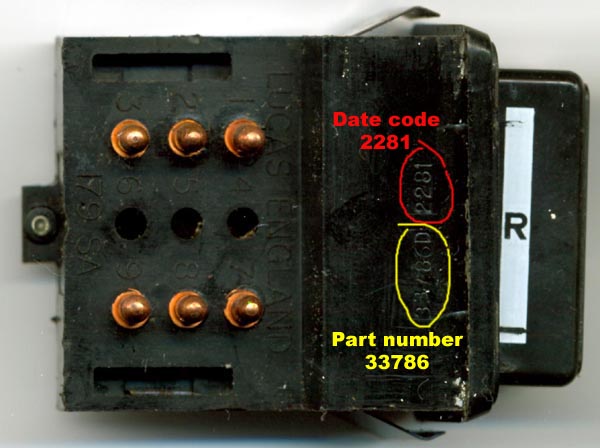
Here is the connector side of a real fuel switch. You can see the date
code 2281 - this one was made the 22nd week of 1981.
|
|
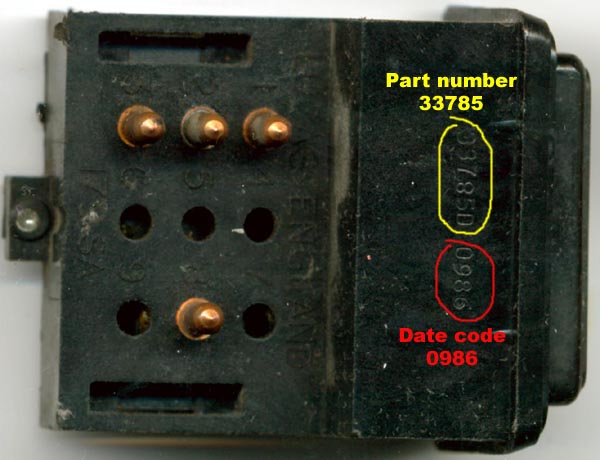
Here is the connector side of a defrost switch. This one has date code
0986 - made the 9th week of 1986. Notice it's pretty much the same, except
for not as many fixed contacts loaded into the housing. (In fact the lone
contact at position 8 is only there to give the sliding contact something
to ride on, so the button will stay square in the housing! There's a
mating contact in the harness connector that doesn't connect to anything,
but helps hold the connector on properly...) The big difference between a
right-hand and left-hand switch is the sliding part (which side the
chambers and the nylon insert are on) and the housing cover (which side the
spring is on, to match the nylon insert in the sliding part.) Did this
subtlety just escape the aftermarket switch people, or are they knowingly
making them wrong, but saving money by using the same parts for all
switches?
|
|
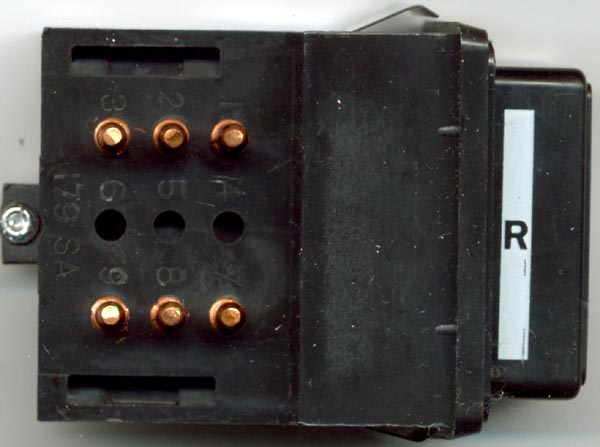
Now the aftermarket switch. No date code, and they've cleverly removed the
"LUCAS ENGLAND" legend from the housing mold.
|
|
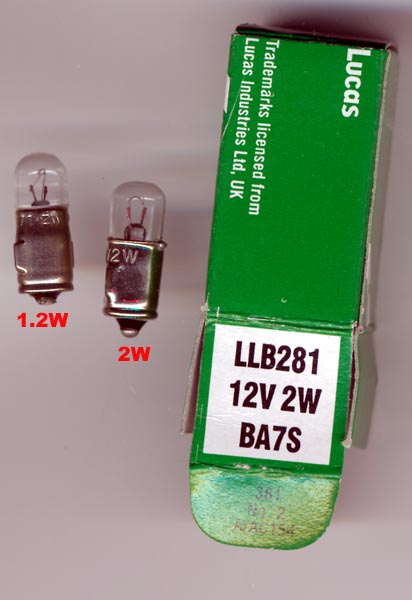
Here is the brighter 2W bulb I installed to try to get a little more light
coming from these switches. It's a common bulb in Spitfire dashes, so a
Triumph parts supplier should have them under this number. An original 1.2W
bulb is shown for comparison. (Note that the 2W version is what is
specified for the Oxygen Sensor indicator on the XJ6, so it's not out of
the question that a Jaguar supplier would have it.)
|
I don't believe they are enough brighter that heat buildup is a problem.
To test this, I put a dash piece together with two switches and a light
pipe with a 2W bulb. I ran this from a 12VDC bench supply for over 24
hours. It certainly gets warm, but there was no melting or discoloring of
the light pipe plastic, so I'd say it's going to be OK. I tried several
other theories on increasing the brightness, but nothing really works...so
far. Either Lucas simply didn't intend these lights to be very bright, or
it wasn't a very good design, or maybe a little of both. But there's just
no question that some aftermarket switch supplier out there has made it
even worse. Be very picky about what you buy - it looks like insisting on
a switch that says "LUCAS ENGLAND" on it is a good way to ensure you get
the one that works correctly.
|